Setting up suppressions for campaigns (like excluding all live bookings for a travel company) is a key part of responsible and effective email marketing.
Here’s why we recommend setting some suppressions up:
1. Avoid confusing or frustrating customers - If someone already has a live booking, they shouldn’t receive marketing messages that offer discounts or packages they can’t use because they’re already booked. They also may think that their booking hasn't been registered.
2. Protect revenue and brand trust - Imagine a customer booking a holiday, then getting an email offering 20% off the same package the next day. This will cause dissatisfaction, refund requests, or brand complaints.
3. Maintain good email deliverability - If customers who aren’t relevant to a campaign delete or mark emails as spam, your sender reputation drops. Using suppressions can help improve relevance, and therefore clicks and open rates.
Setting up a Suppression in Radar
Under Selections, go to Suppressions
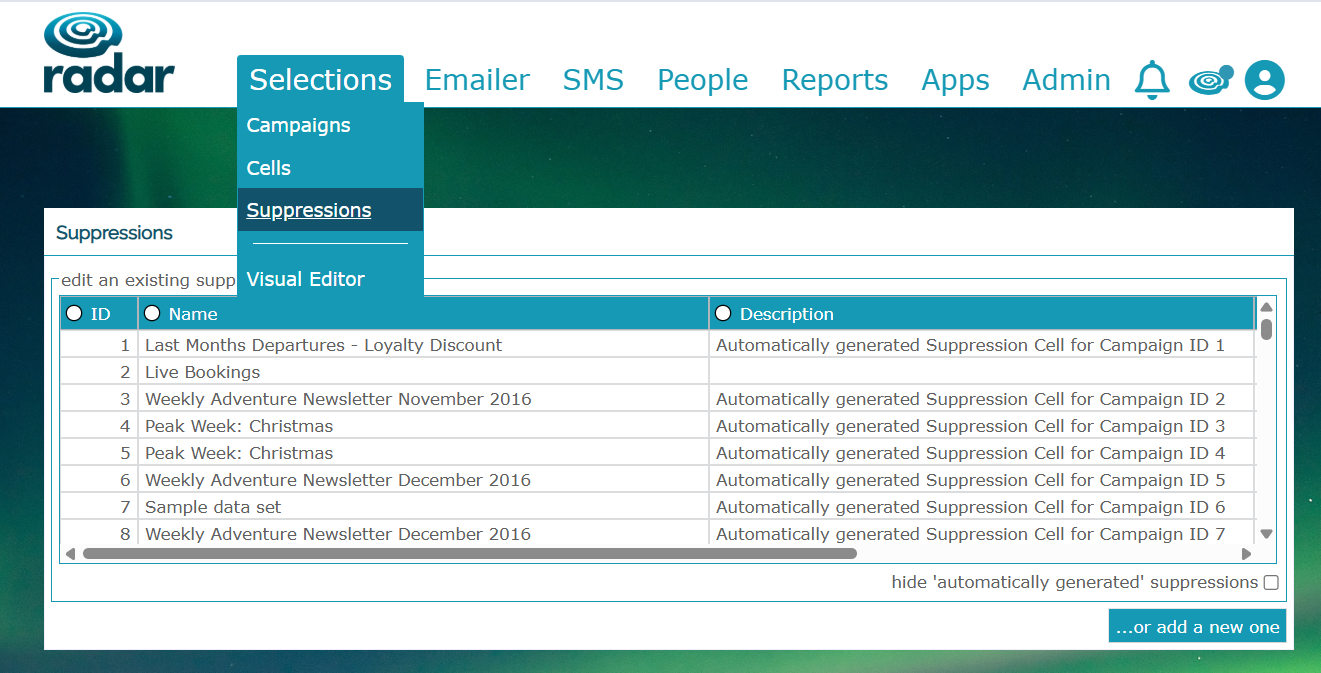
To set a new Suppression group up, click on ...or add a new one
Here it is defaulted to include Individuals with the same email and at the same address - if we set up a Live Booking suppression, for example, we don't want the partner of the person booked to receive an offer or discount.
We can then choose who we would like to suppress. Continuing with our example to suppress all live bookings (a suppression we'd recommend all having), we need to suppress any live bookings.
So we choose for this suppression:
- Bookings>Use Bookings?
- Booking Status is 'Confirmed'
- Return Date>is today and after
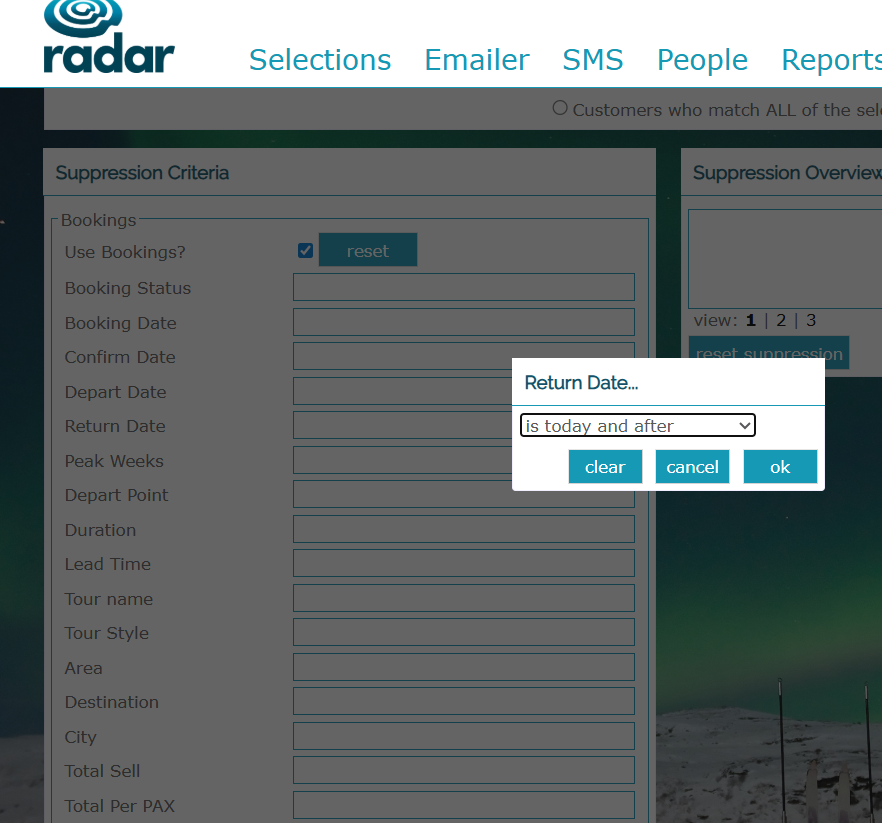
We can then see how many contacts this will suppress on the righthand side, and we can save suppression at this point. Add a name and a description of the suppression - at this point you can add for the suppression to be applied by default and to everyone, if you choose. Or you can just add it in once you create your email campaign audience.
Using your suppression in your Campaign
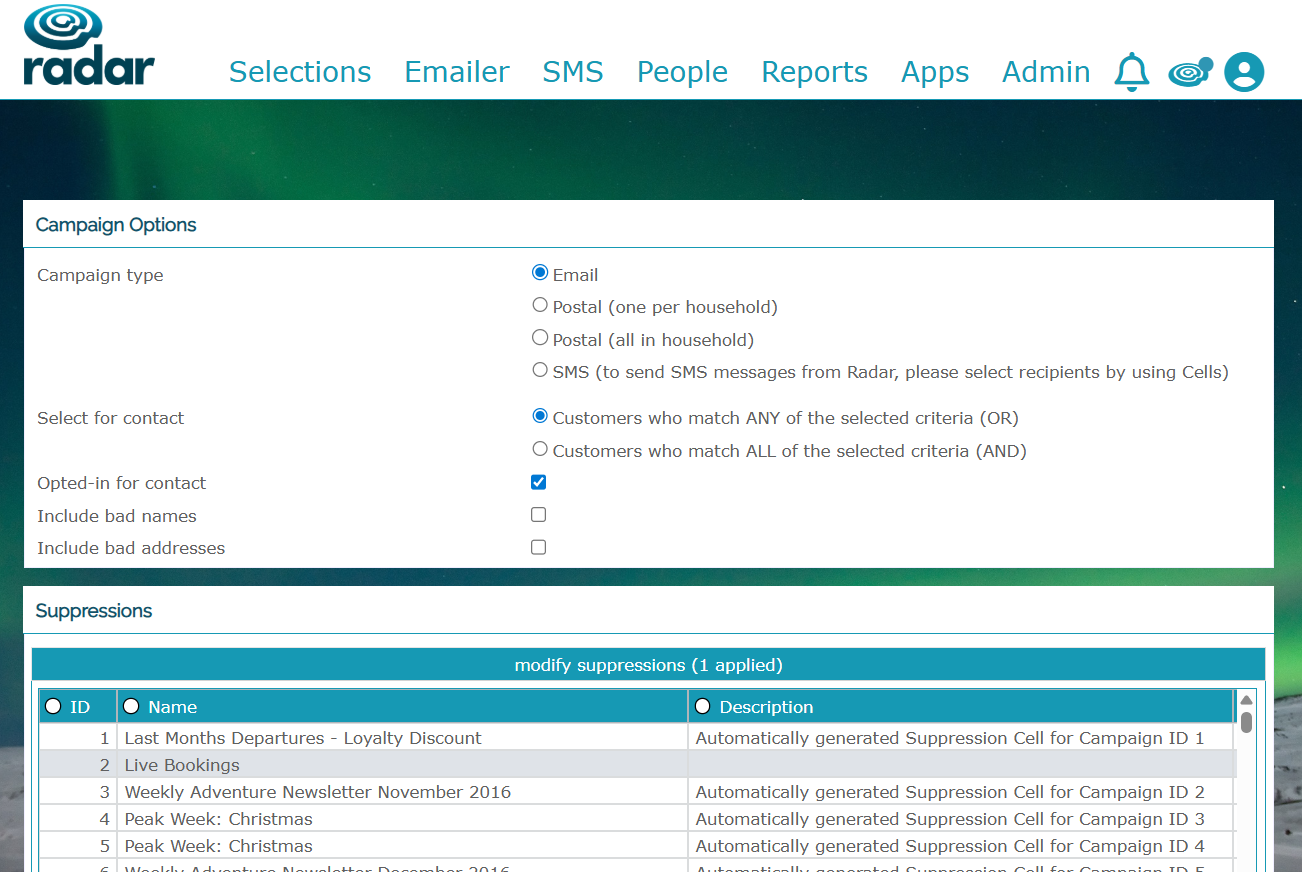
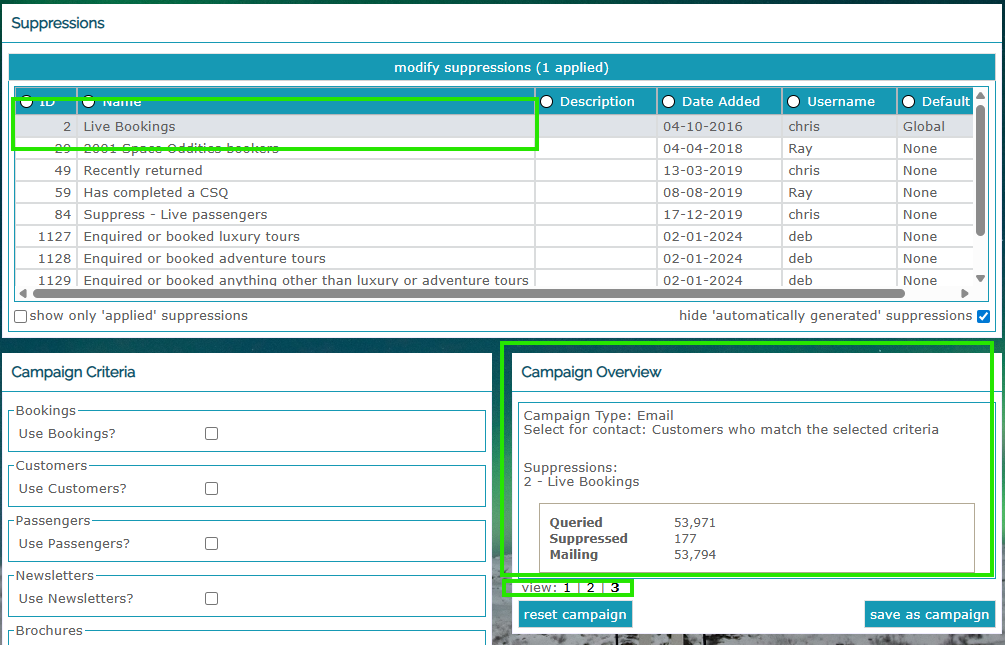
Once you create a new campaign (Selection>Campaign), you can click on Modify Suppressions and add the suppression that you'd like to apply to this campaign. You can choose as many suppressions as needed for that campaign - once the campaign is created, these suppressions will be applied!
Searching for previously set up suppressions
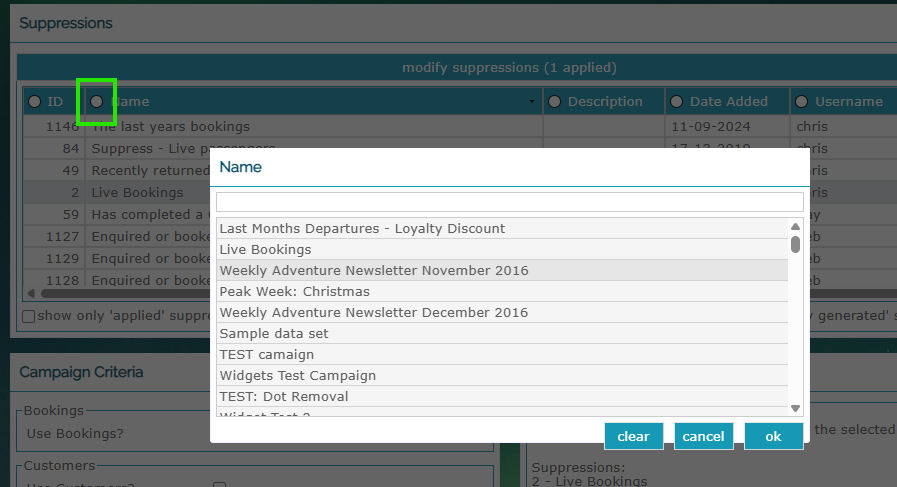
Many suppressions will be used again and again, so you can search for previously set up suppressions in the feedbox by clicking on the button, choose the suppression, and see the criteria they've been set against to reapply:
Automatically generated suppression groups from past Campaigns
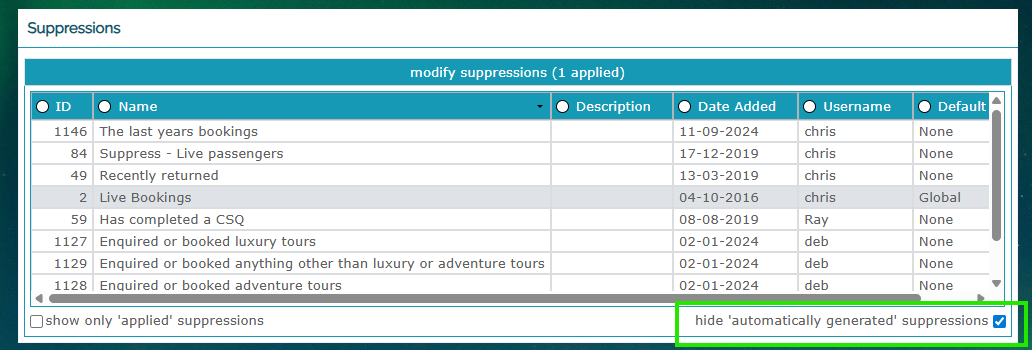
A feature of Radar is that when a campaign goes live, that campaign is set up as an 'automatically generated suppression'. This means that you can suppress contacts that have seen specific campaigns of yours - if you click this, it'll hide these and just show your created suppressions:
Was this article helpful?
That’s Great!
Thank you for your feedback
Sorry! We couldn't be helpful
Thank you for your feedback
Feedback sent
We appreciate your effort and will try to fix the article